AeroPress
For the last two years, my daily morning coffee routine hasn’t changed at all, at least during the working week. My routine is so ingrained I could probably do it in my sleep, and uses just three items; my coffee mug, my Hario Skerton hand grinder, and of course, my AeroPress.
I talked briefly about my introduction to the AeroPress a few months ago (I still haven’t bought a quality electric conical burr grinder yet, but it is still high on my list), and since then my coffee consumption has actually decreased slightly; I average eight cups per week now rather than the 13-15 I did earlier in the year. Nevertheless, with some new coffee equipment arriving recently that may reduce my AeroPress usage, I figured now would be the best time to do a write-up of my routine and experiences.
Design
In the world of coffee, the AeroPress has garnered somewhat of a cult status. The unique design, like a giant syringe (man, can you imagine intravenous coffee?), has transitioned into an icon since its invention a little over a decade ago. Early AeroPress’ were made with clear polycarbonate, although later models (like mine) are made from a tinted copolyester. The AeroPress itself is made up of three core parts; the filter cap, and the two nesting cylinders that compress the water over the coffee grounds through the filter cap. The AeroPress also comes with a coffee scoop, a strring stick, and a coffee grounds funnel, although none of these are strictly required for making a cup of coffee with the AeroPress (in fact, I don’t think I’ve used the funnel and scoop more than a half dozen times since I first bought my AeroPress nearly two years ago). The AeroPress shown in the pictures of this article is actually my second AeroPress that I keep at home - the original, beat-up AeroPress that I use everyday is kept at work.
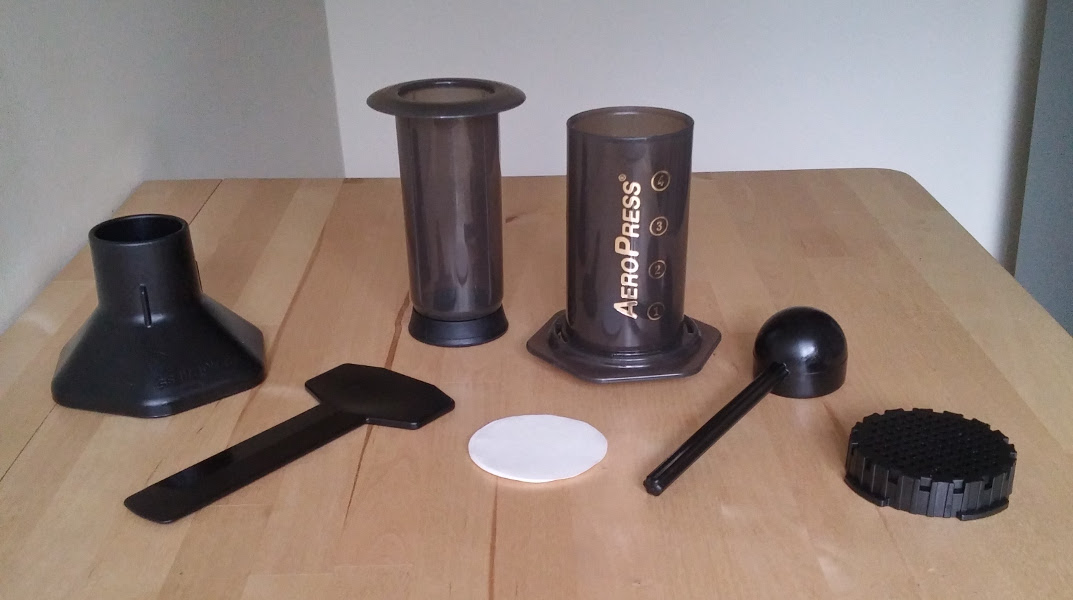 The contents of the AeroPress (left to right: funnel, stirrer, top syringe cylinder, filter papers (filter paper holder not shown because I threw it out), bottom syringe cylinder, coffee scoop, filter cap). Also not shown is my preferred metal filter, as it is made by a third-party, not Aerobie. I don’t usually use the paper filters provided.
Pros and Cons
From a practical point of view, the AeroPress is the best coffee maker I own in terms of portability, ease-of-cleaning, and brewing simplicity. I am yet to make a truly terrible cup of coffee; everything I’ve managed thus far has ranged between above average and spectacular. I’d wager that a gorilla could make a good cup of coffee using only an AeroPress and a jar of his own piss - it is a very forgiving coffee maker when tweaking everything from grind size to water temperature, making it great for beginners.
With that said, one major drawback of the AeroPress is that it is definitely a single-serving method. Unlike a French Press or Chemex that can be bought in larger sizes to make multiple cups at once, the AeroPress requires the whole process to be restarted to make a second cup. Ordinarily, that isn’t too bad; I’m generally making coffee for me and me only, but on the odd occassion when I’m making coffee for guests, I find it much easier to get the Chemex out to make multiple cups at once, as opposed to using the AeroPress over and over again.
Brewing
There are four main methods of making coffee with an AeroPress that I’ve used with varying success over the last two years: normal-espresso, normal-concentrate, inverted-espresso, and inverted-concentrate. The ‘normal’ and ‘inverted’ refer to the orientation of the AeroPress when brewing the coffee, and ‘espresso’ and ‘concentrate’ refer to the amount of water added to the Press. My routine generally involves the inverted-concentrate method; the polar opposite of the normal-espresso method as recommended by the manufacturer, Aerobie. I’ll discuss these two methods here, and I’ll leave the other two as an exercise for the reader to figure out.
Both methods start with the same preparatory steps, so lets cover those first.
Coffee Grounds
Assuming that you’re grinding your own beans, you’re going to want to aim for somewhere between an ultra-fine Turkish-style grind, and a drip-filter-style medium grind. Coarser grinds like those used in the French Press won’t yield great results, as the coffee won’t have time to brew effectively. I prefer to stay towards the medium end of the scale, as the finer grinds can make it difficult to press the coffee through. Also, as I use a metal filter rather than the included paper filters, ultra-fine grinds tend to slip through the mesh, resulting in a gritty cup.
Fortunately, if you’re not planning to grind your own beans (you really should though, the freshness is noticable in the quality of the cup), a standard grind will work perfectly well in the espresso. You’re going to want around 15-18g of coffee for one cup (anywhere between 12-21g will still make a good cup though, it really is that forgiving). One level scoop, using the scoop included with the AeroPress, is a good approximation, although there will be variation depending on grind size.
Water
Your water should be in the 80-95°C range. An electric kettle with a variable temperature would be best, but if that’s not available, bringing a standard kettle to the boil and allowing to stand for 15 seconds before pouring will generally yield a good temperature range for the AeroPress.
‘Normal-Espresso’
This is the method that Aerobie themselves recommend, and was the method I myself used for the first few months exploring the AeroPress, using paper filters.
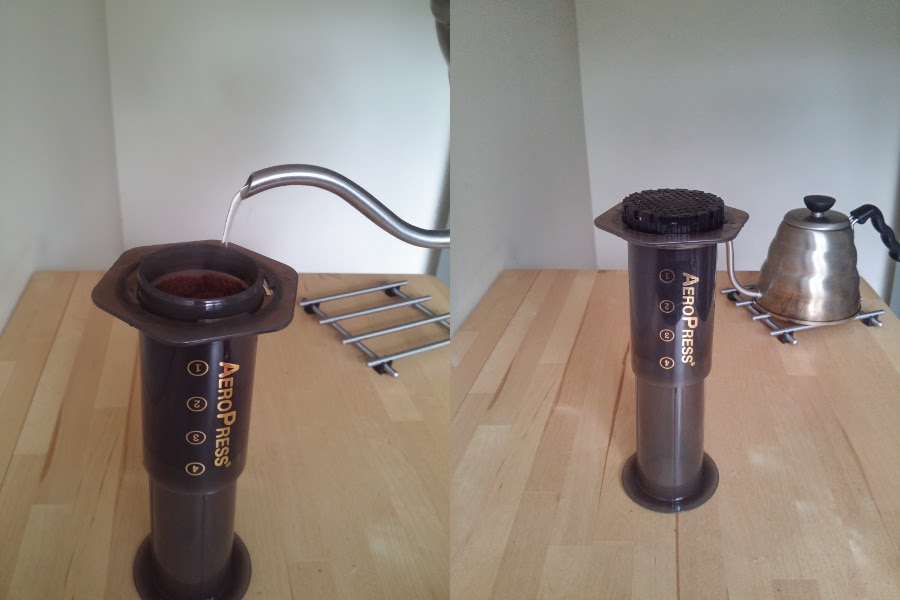
To set up, place a paper filter into the filter cap, wet with hot water to keep in place, then screw the filter cap into the wider cylinder and place on top of your coffee mug.
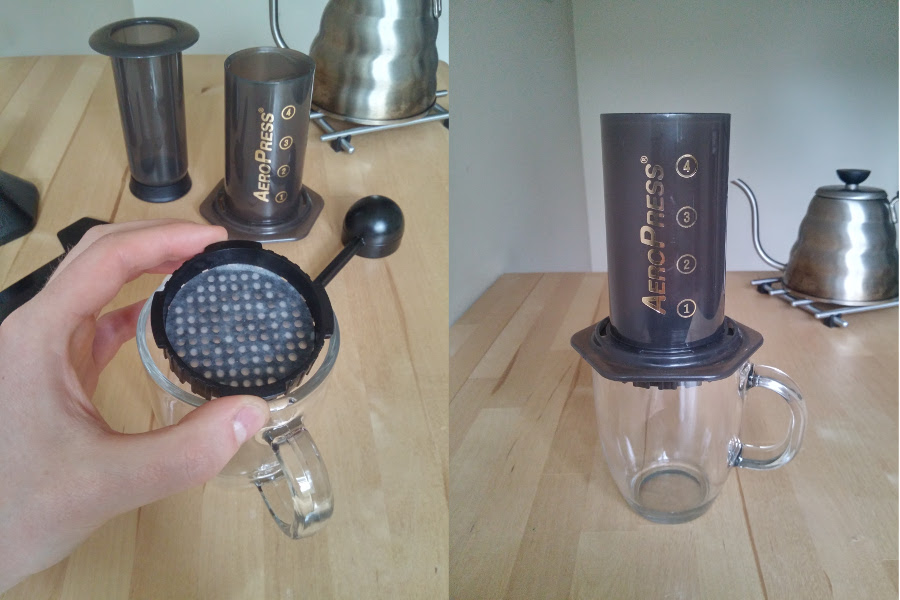 Left: wet the paper filter in the filter cap. Right: set up the bottom half of the syringe on top of your coffee cup.
Pour in your coffee grounds and shake the cylinder to spread them evenly. Next, pour on approximately 30g of water (double the amount of water as coffee grounds), stir for 10-15 seconds using the AeroPress stirrer, then insert the top half of the filter and press down for around 30 seconds, until you hear the AeroPress start to ‘hiss’.
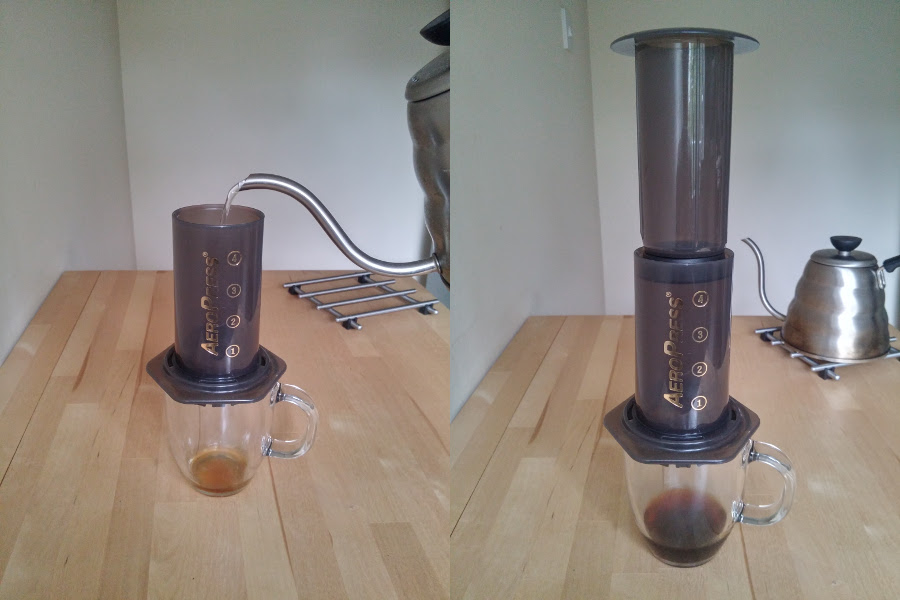 Left: add your coffee grounds and water to the AeroPress cylinder. Note that some coffee will start to filter through into the cup almost immediately - this is normal for any non-inverted method. Right: insert the top half of the syringe and press down.
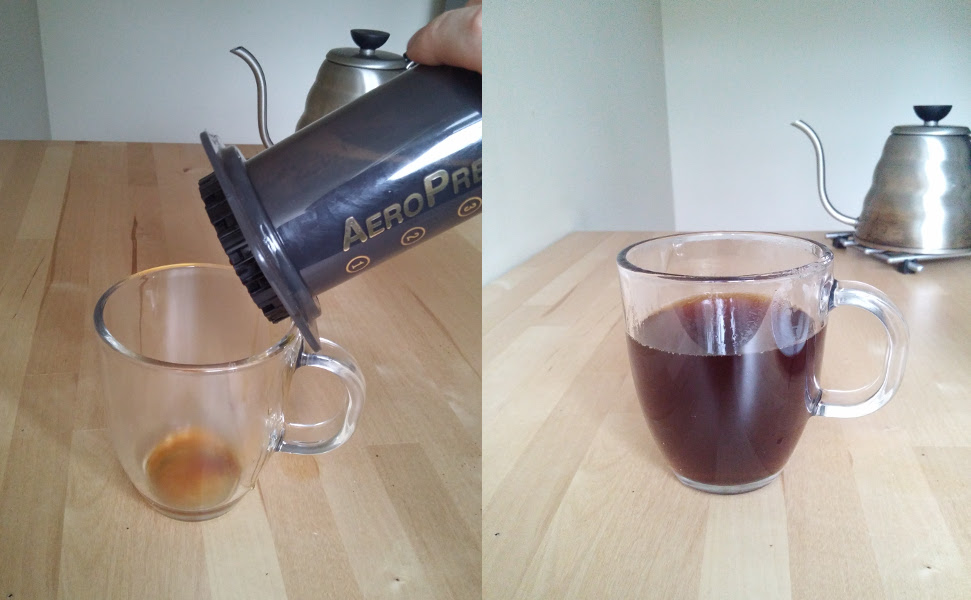
This will leave you with an espresso-amount of concentrated coffee. Add hot water to your liking for an Americano, and enjoy!
 Left: the espresso-esque result. Right: a full cup of coffee (after adding more water to make an Americano-style cup).
‘Inverted-Concentrate’
This is my preferred method for coffee with the AeroPress, particularly at work where I don’t have a kettle, only a water-boiler, which isn’t ideal in terms of precision, but in practise doesn’t make a great deal of difference.
To set up, slightly moisten the rubber seal of the syringe under running water, then insert it about an inch into the wider cylinder (the seal should be about level with the 4 on the outer cylinder). Flip upside-down, and then add your coffee grounds to the AeroPress.
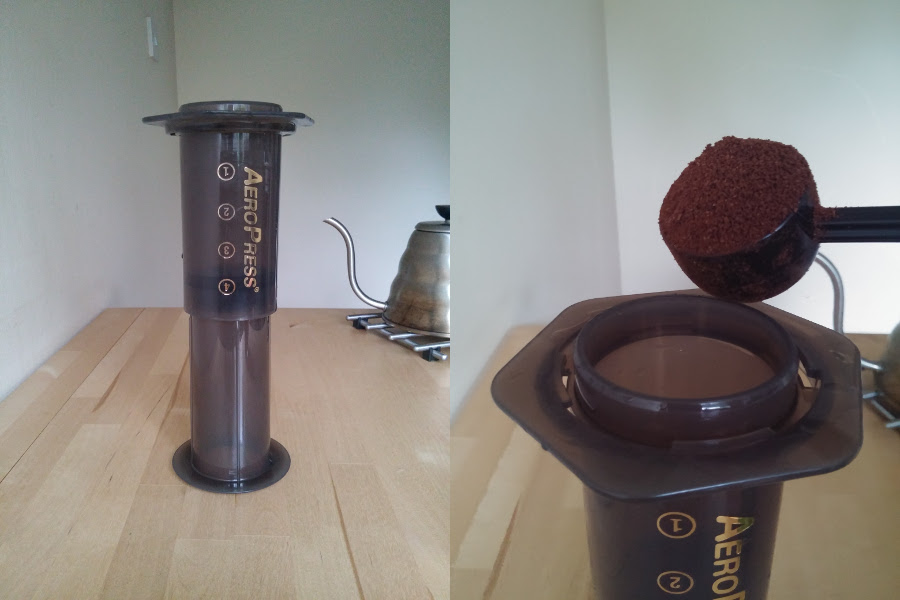 Left: insert the syringe an inch into the cylinder and turn upside down. Right: add the coffee grounds to the AeroPress.
Next, add the hot water. Initially add the same 30g of water, and leave to sit for around 30 seconds. After that, you want to fill the AeroPress chamber all the way, up to about the gap where the filter clips into place (too high will mean you spill over the sides when you stir). Stir gently for about another 30 seconds, then clip the filter cap with filter onto the top of the AeroPress (either wet the filter paper to keep it in place, or balance your metal filter and then clip the cap on top of it).
 Left: add the hot water and fill up to almost the lip. Right: fill with water, stir, and clip the filter cap into place.
Now, carefully flip the AeroPress into your coffee cup, then press for a further 30 seconds as with the normal-espresso method. This should provide you with a full cup of coffee, although you can obviously add more water if required.
 Left: carefully flip the AeroPress into the coffee cup. Right: a full cup of coffee (no added water)
Cleanup
In all methods, cleanup is the same, and relatively quick and painless. First, unscrew the filter cap carefully, peel off the filter (if you plan to reuse it, otherwise just leave it in place), aim your AeroPress over the bin and press down firmly on top of the syringe until it pops the coffee-ground puck out. Rinse the excess coffee off the AeroPress parts, then wash with soapy water and allow to dry. Easy!
Final Notes
Hopefully I’ve managed to convey my love of the AeroPress well here. A couple of final tips that I’ve picked up while using the AeroPress:
-
Don’t clip the filter cap on for storage. When storing your AeroPress, assuming that you keep it assembled, don’t clip on the filter cap. You want to push the rubber seal all the way through the cylinder, and doing this will mean you don’t have space to clip on the filter cap. This is a good thing; if your filter cap is clipped in place, it means the rubber seal isn’t fully through the cylinder, and can deform if left for long periods of time in this state.
-
No pressure. Both in a literal sense and a metaphorical sense. When pressing the syringe, don’t feel like you need to force down with all your might. The weight of your forearm and gravity should be enough to press your coffee through in the correct amount of time. Relax.
If you don’t already have an AeroPress, they can be picked up reasonably cheaply in most quality coffee stores, or online stores such as Amazon generally have them. They retail for around £20-25, and a pack of 350 replacement filters is around £4-5 (as is a third-party reusable metal filter), so nothing to break the bank. If you’re thinking about diving into the world of good quality coffee, you need look no further than the Aerobie AeroPress.
Now, if you’ll excuse me, I’m suddenly feeling the urge to make myself a cup of coffee.
Recent "coffee" posts
| French Press | 15 Apr 2017 |
| Moka Pot | 19 Mar 2017 |
| Chemex | 08 Jan 2017 |