Moka Pot
Back in January, Sasha and I spent a few days in Rome for her birthday, and being in Italy, we naturally spent a lot of our time drinking Italian-style coffee. When we got back, I asked Sasha for a specific gift for my birthday the following month; a Moka Pot.
Whilst in Rome, we visited the Sant’Eustachio Il Caffè, and I bought myself a little yellow espresso cup with the Moka Pot in mind, to go with the pair of Bodum espresso glasses I already had on my coffee shelf at home.
Design
The moka pot, like the Chemex, comes in many different sizes. The version Sasha bought me as a birthday gift is the Bialetti 3-cup, although as this is an espresso maker, a ‘cup’ is obviously much smaller than a Chemex or Aeropress cup. Again, similar to the Chemex, the Moka Pot is a relatively unchanged design since it was first invented by Luigi De Ponti for Alfonso Bialetti in Italy back in 1933 (eight years earlier than the Chemex). The typical Moka Pot is octagonal in shape, made of aluminium with a black Bakelite handle, although round and coloured variations are available. Whilst the design is undoubtedly iconic, the Moka Pot doesn’t quite have the same aesthetic appeal as the Chemex; that said, I’m judging mainly on the coffee produced than the artistic feel of my coffee shelf.
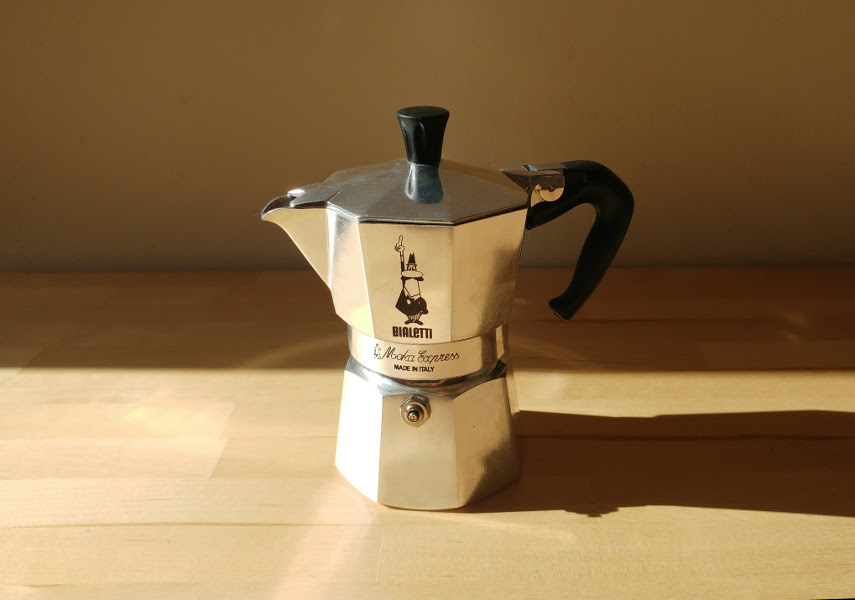 Bialetti Moka Pot 3-cup
Brewing
With the Moka Pot, all of the effort for brewing comes in the preparation. Once you’ve set up the Moka Pot to brew, there really isn’t anything to do other than wait for the brewing to finish. Usually, your instructions here would tell you to ‘go make a cup of tea while you wait’, but somehow that wouldn’t feel appropriate here…
To get set up, first of all, fill the bottom of the moka pot with water fresh off the boil, up to the level line on the inside of the brewer - this aligns with the safety valve on the outside of the base. Place the metal filter basket into the brewer base.
The moka pot requires about 15-20g of coffee, ground relatively fine. Filling the metal filter basket to level (not tamped) is about the right amount of coffee to use. If the grounds are uneven, shake it a little to level them out. Brush away any loose grinds that have made their way into the thread of the screw-top. Screw on the top part of the moka pot, taking care not to burn your hands on the base which by now will be very hot.
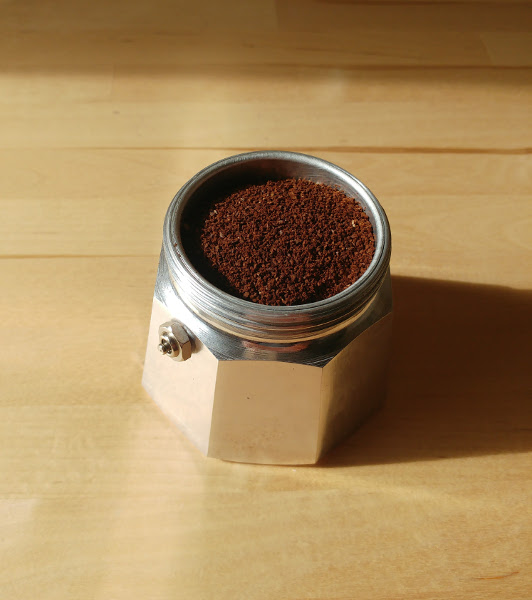 Moka Pot base filled up with water and with coffee grounds in the filter basket.
Place the moka pot onto a medium stovetop, making sure the handle is away from the flame. The steam from the bottom of the coffee will bubble up through the coffee grounds into the top compartment. This is the part where you just need to wait. When you hear a soft bubbling hiss, the coffee is finished brewing and can now be removed from the heat. Run the base of the moka pot under cold water, then pour out your espresso coffee.
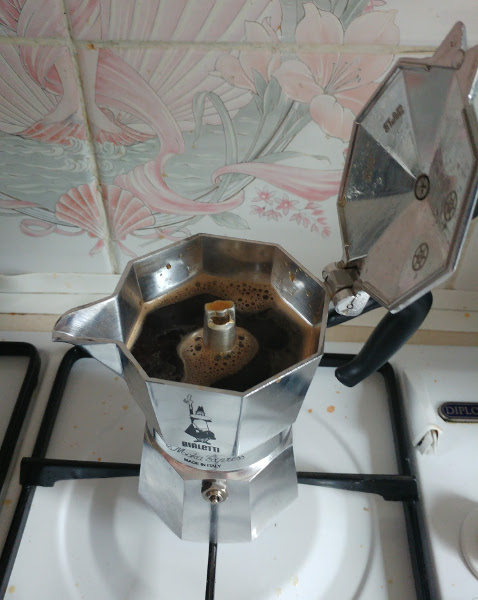 Opened Moka Pot on the hob with coffee in the top chamber.
Verdict
Overall, the Moka Pot produces a fantastically rich and smooth espresso with very little effort. Once the process is set in motion, there’s no additional undertaking required, no pouring water, no pressing, just sitting back and waiting. Sometimes, like the Italians, you don’t want a full 12oz coffee, an espresso-sized amount is just enough. For simplicity, there’s nothing that can beat the Moka Pot in this category.
 Moka Pot with espresso cups of coffee.
Recent "coffee" posts
| French Press | 15 Apr 2017 |
| Chemex | 08 Jan 2017 |
| It's American Press | 19 Nov 2016 |