Chemex
Towards the end of last year, I did a couple of write-ups of my two weekday coffee makers - the AeroPress and the American Press. Now it’s time for what I call my “Sunday coffee maker” - the Chemex.
The Chemex comes in three series, each with four different sizes. The Classic and Glass Handle series are available in three, six, eight, and ten cup sizes, whereas the Handblown series comes with three, five, eight, and thirteen cup sizes. Lots of options, but I elected to go for the Classic Six Cup Chemex, probably the most easily-recognisable of the Chemex flavours.
Design
I will start by saying that the Chemex is still clearly the prettiest piece of coffee equipment I own. Invented in 1941 by German chemist Dr. Peter Schlumbohm, the simplistic design has remained unchanged in the intervening 70 plus years. The hourglass shaped Chemex body is made of borosilicate, with a distinctive heatproof wooden cuff around the neck of the funnel, tied with a leather knot. The contrast between the serious, laboratory-esque glassware and the natural wood and hand-tied knot provides a nice metaphor for the relaxed yet precise nature of a good cup of coffee. As well as being aesthetically pleasant, as the Chemex brews more than just a single cup, it’s more appropriate for lazy Sunday mornings at home than the manically caffeine-fuelled working week.
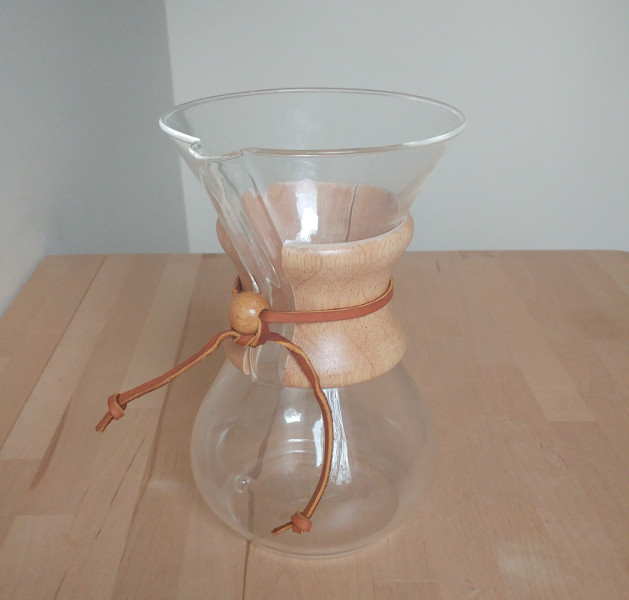 Chemex without a filter.
Brewing
Continuing the laboratory theme, the Chemex requires a lot more precision and care to brew a truly good cup of coffee than the AeroPress or American Press. Both of these can handle pretty much any grind-size or press time within reason; it’s actually comparatively quite difficult to make a poor cup with either method. The Chemex on the other hand, requires a quite narrow band of coffee grounds - too fine, and the water will take too long to drip through the grinds and over-extract, giving a dry, bitter cup. Too coarse, and the coffee will under-extract, leaving you with a sour, empty coffee. A medium grind works well, about the consistency of sea salt.
I use about 50g of coffee for my Chemex. Along with the thick, bonded, specialist filters the Chemex uses, this is by far the most expensive brewing method I use. Still cheaper and better quality than any of the high-street chains though.
Brewing with a Chemex also requires a goose-neck kettle. Unlike the AeroPress or American Press, it does matter how the water is poured onto the coffee grounds; it also requires multiple pours, so a kettle that can maintain water temperatures is a necessity. I use the somewhat low-tech Hario V60 Buono kettle and a low flame when I brew (I like the simplistic old-school routine with the Chemex), although undoubtedly better results can be achieved with a digital kettle like a Bonavita.
To prepare the Chemex for brewing, first take a filter paper cone and open it out, placing the triple side at the spout of the Chemex. Bring your gooseneck kettle to the correct temperature, and wet the paper to stick it to the sides of the Chemex - this water can be poured out afterwards. Next, add the coffee grounds to the filter cone, and give the Chemex a gentle shake to flatten out the grounds.
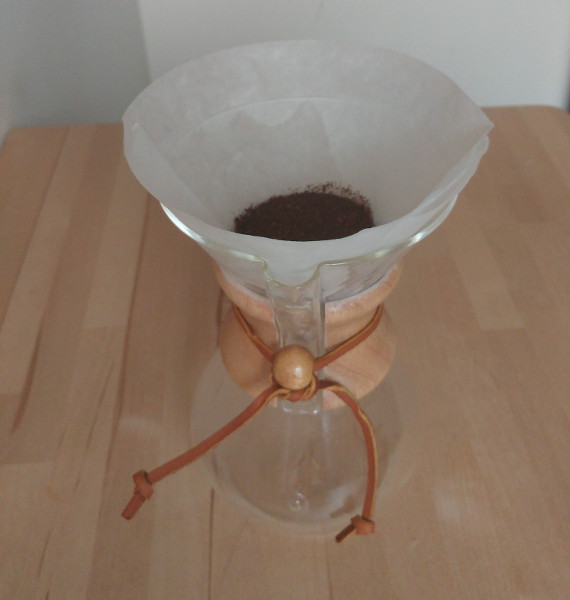 Chemex with a filter paper prepared and coffee grounds added.
Pour some of the water into the centre of the coffee grounds, to the point where the grounds are fully saturated and bloom upwards (about 70-100g of water). Allow to sit for 45-60 seconds, letting the coffee start to drip into the carafe. Be sure to enjoy this part - the coffee aromas from the bloom are wonderful.
 Coffee blooming after the first pour into the Chemex.
Once the bloom has dissipated, slowly pour on the rest of the water, spiralling outwards in concentric circles until you almost reach the filter paper then starting again from the centre. If the water level comes close to the rim of the Chemex, stop until it recedes and continue pouring. This step should take around 60-90 seconds, and should use about eight times as much water as you have coffee (so for 50g of coffee grounds you should be pouring on about 400g of water). After this step, fill the water to the rim of the Chemex, and leave to sit for two minutes or so until all of the water has filtered through.
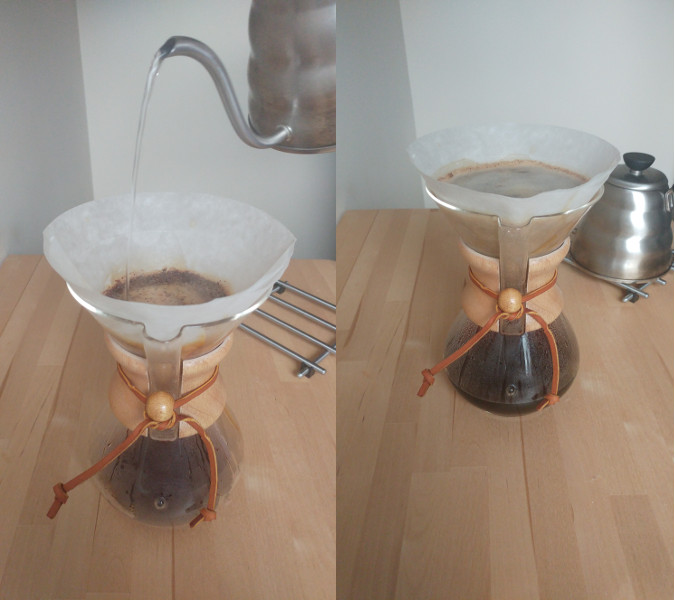 Left: spiralling the water outwards over the grounds. Right: filled Chemex waiting to filter through into the carafe.
Hopefully, this should leave you with enough coffee to just about reach the ‘nipple’ of the Chemex - about two cups worth (roughly 600ml, or 20 fluid ounces). Once the coffee stops dripping, remove the filter (be careful not the spill out any grounds into the carafe). Discard the grounds and filter (the filter can be washed and reused if desired, but I find that it’s never as good the second time. Your mileage may vary). Pour and enjoy.
 Chemex after removing the filter
Cleanup
Be sure to remove the wooden neck of the Chemex to clean it, otherwise scum will build up underneath between the wood and the glass. The leather knot is easy to remove, and keeping it away from water will prolong its lifespan. Cleaning the inside of the Chemex can be a pain as human hands are too big to fit into the neck, but I find that using a Dishmatic sponge with hot soapy water does the job fine.
Verdict
With care and attention, the Chemex is perfectly capable of producing a clean, floral cup of beautiful coffee. Without care and attention, you can end up with a cup of garbage. There are much finer margins with the Chemex than most other coffee brewers like the AeroPress, American Press and French Press, but the pay-off is just as high when it all comes together.
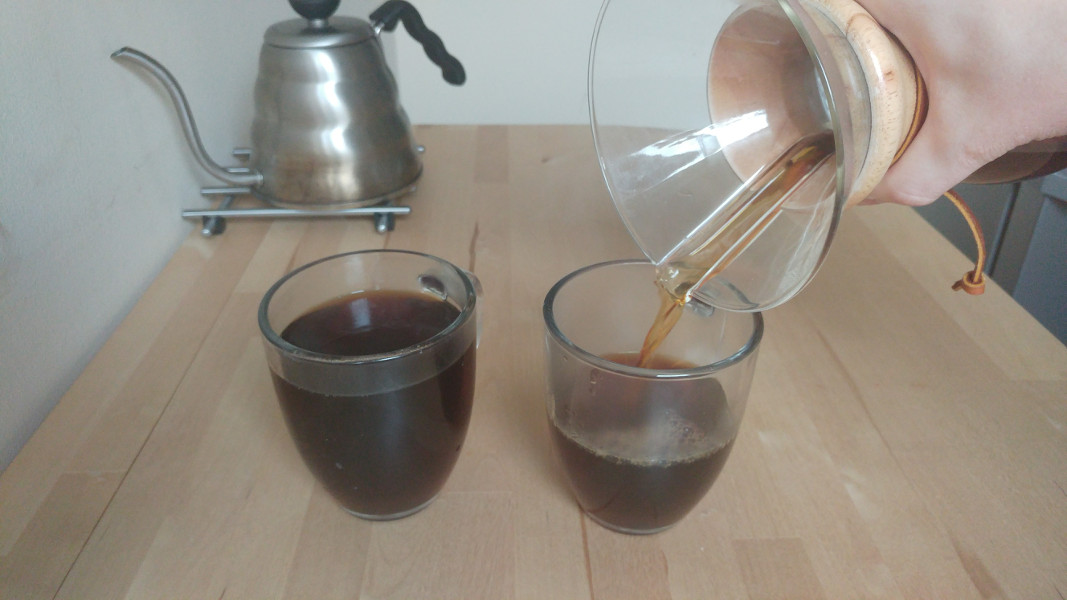 Pouring out the labour of love
Recent "coffee" posts
| French Press | 15 Apr 2017 |
| Moka Pot | 19 Mar 2017 |
| It's American Press | 19 Nov 2016 |